Smart Speakers
- BiniJohn
- Apr 25, 2023
- 1 min read
Updated: May 12, 2023

Smart speakers, such as Amazon Echo, Apple HomePod, Google Nest, and other similar devices, are voice-activated devices that offer a wide range of features and capabilities, including voice commands, music streaming, smart home control, and more. These devices can greatly enhance your home automation experience, but it's important to consider privacy and security measures to protect your personal information. We have mentioned some of the important settings to remember when setting up your device below.
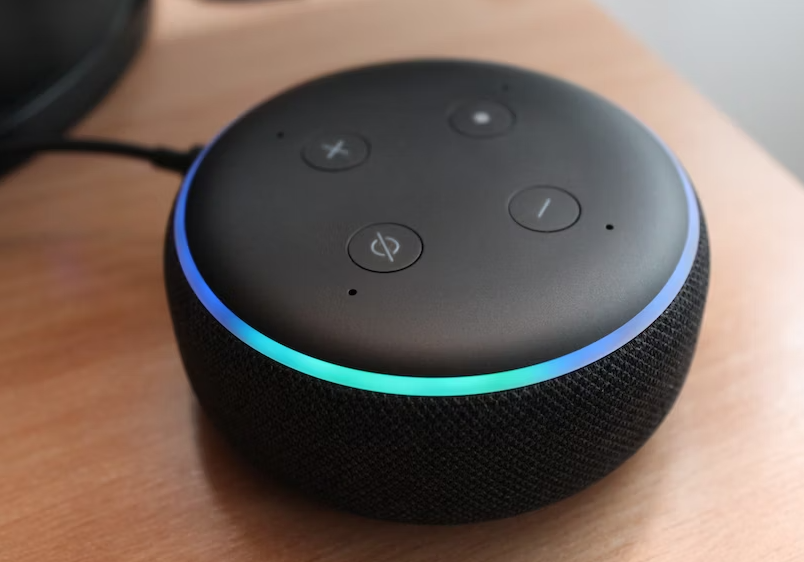
Amazon Echo
Amazon smart speakers, such as the Amazon Echo, are popular voice-activated devices that provide a range of features and capabilities, including voice commands, streaming music, smart home control, and more.
Change Default Wake Word
Using App: Open the Alexa app > Devices > Echo & Alexa > Choose the device you want to change the name for. You need to change it individually on each Echo speaker or display. > Tap the Settings icon > Wake Word > Choose your new wake word. (Example: Amazon, Computer, Echo, or Ziggy.)
Using device: Say “Alexa, change your wake word.” > Alexa will say “OK, you can choose from Amazon, Computer, Echo, or Ziggy — which of these do you like?” > Say “Computer” (or whichever word you want) > Alexa will say “OK, you can call me ‘Computer’ on this device in a few seconds.”
On an Echo Show: Swipe from the top of the screen > Settings > Device Options > Wake Word > Select the option you want to use on this device
Disable active listening
1. Press the microphone mute button > The light should turn red. This means that the device is no longer listening to voice commands.
If you wish to use Alexa again, simply press the button again. You can always turn the mic off when not in use.
Opt-out of data sharing
Open the Alexa app > Menu > Settings > Alexa privacy > Manage how your data improves Alexa > Switch off the toggle next to ‘Help improve Amazon services and develop new features’, and ‘Use messages to improve transcriptions.’
Manage voice recording - Don't save recordings!
Open the Alexa App > Settings > Alexa Privacy > Manage Your Alexa Data. From here, select Choose "How Long to Save Recordings"> "Don't Save Recordings" > Confirm.
Delete your command history
Via the app: Open the Alexa app > Menu > Settings > Alexa Privacy > Review Voice History > Tap on "Date Range" to delete recordings. > Select the time period to delete all transcripts within that range.
Using Echo: Open the Alexa app > Settings > Alexa Privacy > Review Voice History > Switch on (toggle) "Enable deletion by voice" to delete recordings using an Alexa-enabled device. (A pop-up will inform you that anybody with access to the device can now delete recordings) > Tap on "Enable." > Ask Echo "Alexa, delete everything I've said today." Alexa will ask to confirm before doing so.
Using the Amazon website: Pull up https://www.amazon.com/alexaprivacysettings > Devices > Click on your Echo > Click on "Delete voice recordings" under the Echo menu. > A pop-up will again ask to confirm the deletion of your voice recordings. > Click on "Delete" again and all recordings will be deleted.
Set-up voice recognition using Alexa ID
1. Add your voice (Personal or main account): Open the Alexa app > More > Settings > "Your profile and family" > Your profile > Add your Voice.
2. Add your family member's voice: Open the Alexa app >Sign in using the Alexa account you want to add a voice ID to > Select your family member's profile, or select I'm someone else to make a new profile > Confirm first and last name > Complete the setup process> More > Settings > “Your profile and family” > Select the profile that is logged on the app > Set up Voice ID.
3. Add your Kid’s voice: Open the Alexa app > Settings > Amazon Kids > If you have an existing Kid’s profile, select your child’s name, and then select Set Up. Otherwise, select Add a Kid and follow the on-screen instructions > Teach Alexa your child's voice and complete the setup process.
To turn the personalized skills off
Google Smart Speakers
Google smart speakers, such as the Google Nest Mini or Google Nest Hub, are voice-activated devices that offer a range of features and capabilities, including voice commands, music streaming, smart home control, and more. When setting up and using Google smart speakers, it's important to consider privacy and security measures to protect your personal information. Here are some key settings and best practices to keep in mind:

Disable active listening
Google Nest Mini: Look for a small, circular Mic Off switch on the back of the unit near the power cord.
Google Nest: Look for the Mute button on the back of the display at the top.
Google Nest Max: Same as on Google Nest, look for the Mute button on the back of the display at the top.
Opt-out of data sharing
Google Home app > Accounts tab > Manage your Google account > Manage your data & personalization > Voice and audio activity > Switch the toggle to off.
Delete your command history
Delete recordings individually: Google Home app > Tap your personal icon > My Activity > Scroll through the history list to find a recording you want to delete > Tap the cross to the right of the recording and tap Delete.
Delete recordings between specific dates: Google Home app > Tap your personal icon > My Activity > Above the list of recordings, tap Delete icon > In the dropdown box, choose what date range needs to be deleted (today, custom, all-time).
Delete recordings automatically: Google Home app > Tap your personal icon > My Activity > Before the stream of recordings, tap the option that says Auto-delete > Keeping data until you delete it is the default setting, but you can keep it for 3, 18 months, or 36 months before it disappears automatically.
Delete recordings using your voice: "Hey Google, delete the last thing I just said to you," or, "Hey Google, delete everything I said to you last week."
Set-up voice recognition - Train your speaker!
Google Home app > Settings >"Voice Match" > "Set up Voice Match"> Follow the prompts to record a few phrases, such as "Hey Google" or "OK Google", and then repeat them a few times.
(Repeat the process for other users: If you share your Google smart speaker with other people, repeat the process for each person to set up their own voice match.)
Apple Smart Speaker
Apple smart speakers, such as the HomePod or HomePod mini, are voice-activated devices that provide a range of features and capabilities for Apple users, including voice commands, music streaming, smart home control, and more. When setting up and using Apple smart speakers, it's important to consider privacy and security measures to protect your personal information. Here are some key settings and best practices to keep in mind:
Disable active listening
Using voice command: “Hey, Siri, stop listening.” The speaker will remind you that this command will turn off the mic . To turn the mic back on, touch and hold the device’s touch surface and say “start listening” to turn the mic back on.
Using the App: Apple’s Home app > Rooms tab at the bottom of the screen > swipe to the room containing your HomePod > press and hold the HomePod icon, then toggle the switch for ‘Listen for Hey Siri’ to off.
Review or delete your recordings
Home app> Settings > Siri History > Delete Siri History.
Set-up voice recognition - Train your speaker!
Make sure your iPhone or iPad is connected to the same Wi-Fi network as your HomePod.
Open the Home app > Tap and hold the HomePod icon > Settings > Scroll down to "Siri" > "Recognize My Voice" > Follow the on-screen instructions to train Siri to recognize your voice. You will be asked to say a series of phrases to help Siri learn your voice. Once you have completed the voice training process, Siri will be able to recognize your voice and respond to your commands.
Turn off Location Services on HomePod
Siri uses your HomePod location to provide local information such as traffic, weather and nearby businesses.
Home app > More (…) > Home Settings.
To edit a different home - tap Homes > then tap the home you want to edit > Scroll down, then turn off Location Services.


Comments